Assembly Manual
Overview
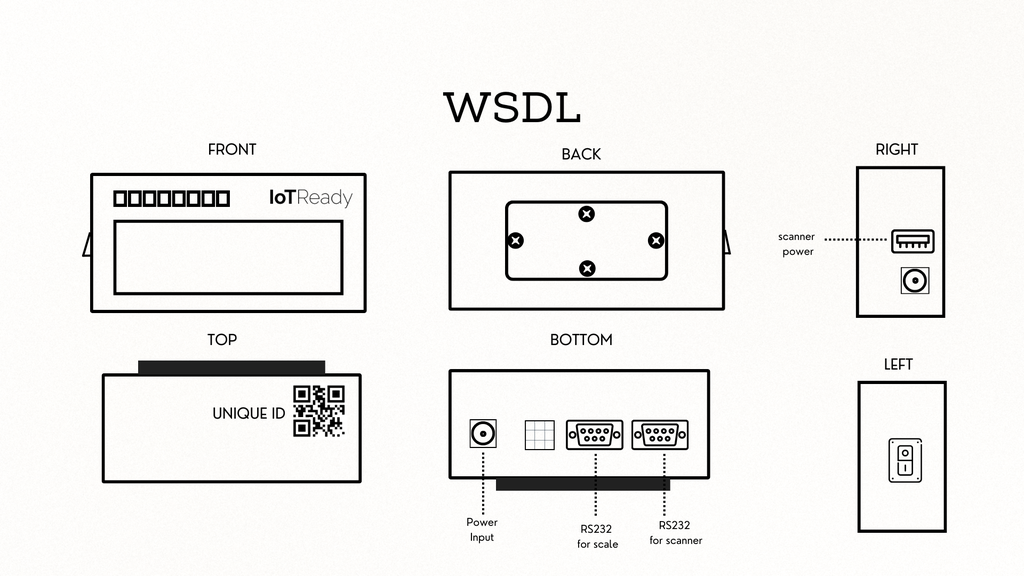
The following document explores the processes of unboxing and assembly of the Serial Traceability System.
Estimated Time Required for Unboxing and Assembly: 20 mins
Disclaimer: Please power on the device only after all the connections are made.
Contents:
1.0 UNBOXING
2.0 ASSEMBLY
2.1 Assembling the Base Plate
2.2 Mounting the Data Logger
2.3 Connecting Cables
3.0 POWERING ON
1.0 UNBOXING
Instructions:
- Carefully cut open the tape that covers the package.
- Open the box and remove the foam packaging.
- Carefully remove all the contents from the box.
- Ensure all items are available as mentioned on the next page.
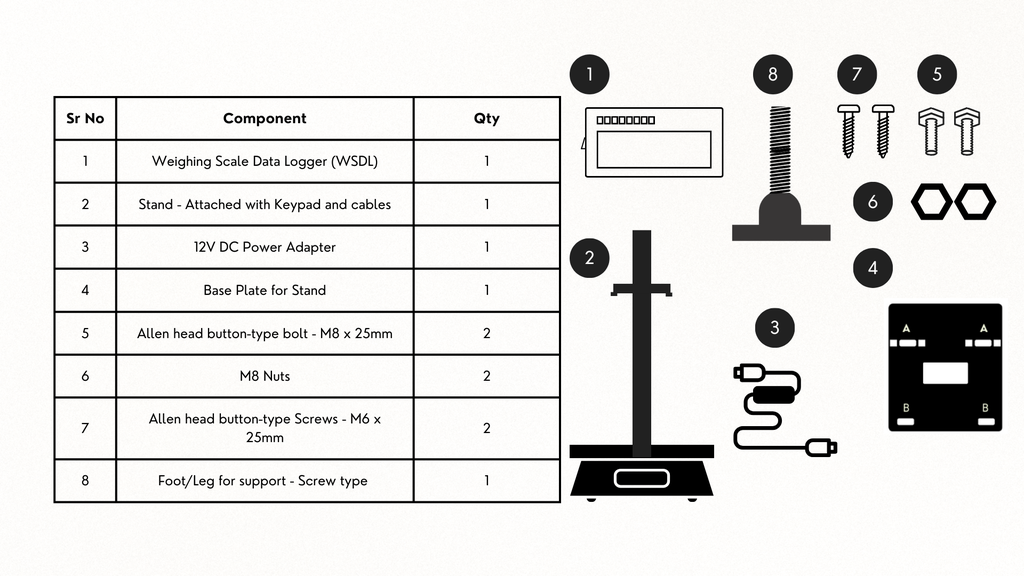
2.0 ASSEMBLY
The assembly of the Centralized Label Management solution contains 3 main steps.
Step 1: Assembling Base Plate
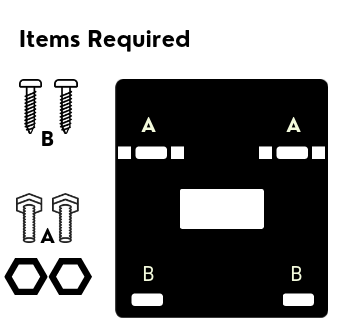
- Hold the base pad in your hand and follow the instructions below:
- Put the M8 bolts through the holes labeled as A in the diagram after aligning the keypad stand on the same holes.
- Set the M6 screws through holes labeled B.
- Make sure all the screws are fastened.
Disclaimer: Please ensure no obstructions between the plate and scale before tightening it.
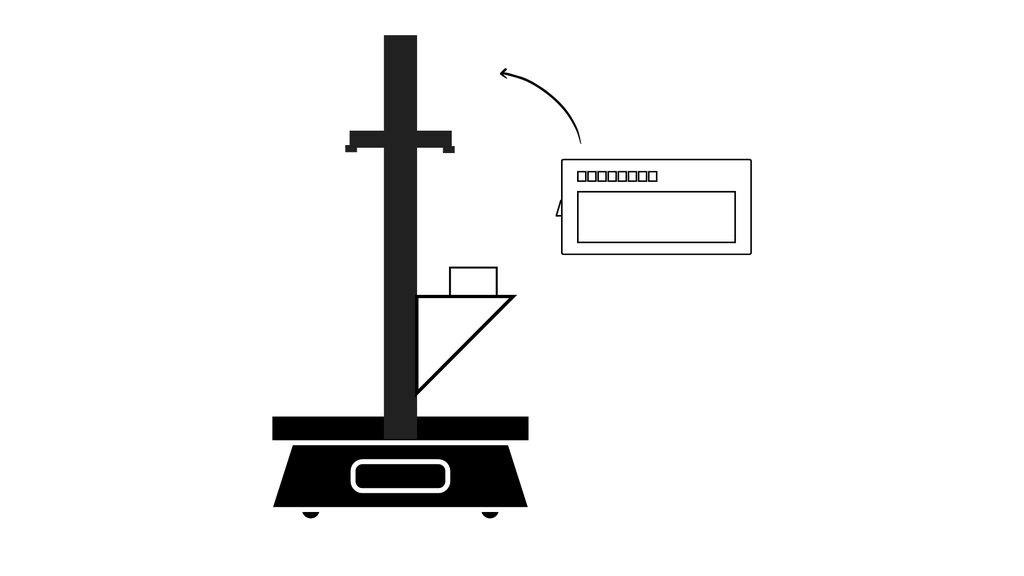
Step 2: Mounting the Data Logger
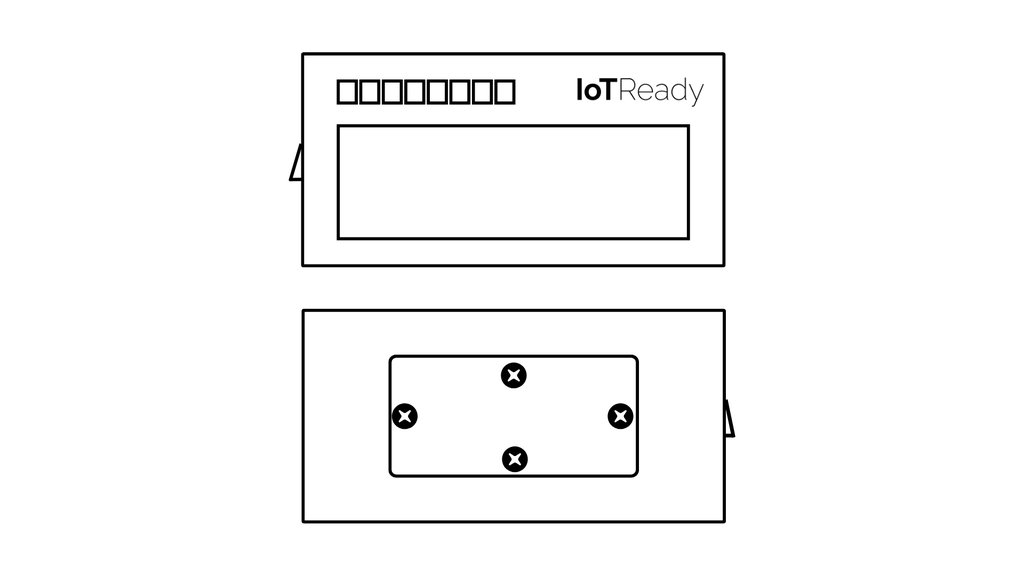
- Note that the side with the Device ID and the QR code is Up, and the provision for the ports is Down.
- Keep the assembly such that the front of the weighing scale and keypad faces you.
- Take the Weighing Scale Data Logger, and ensure you are holding the equipment upright.
- Attach the Weighing Scale Data Logger using the spring mount to the din rail by snapping it on.
Tip: The Weighing Scale Data Logger seamlessly moves up and down the length of the supporting rail.
Step 3: Connecting Cables
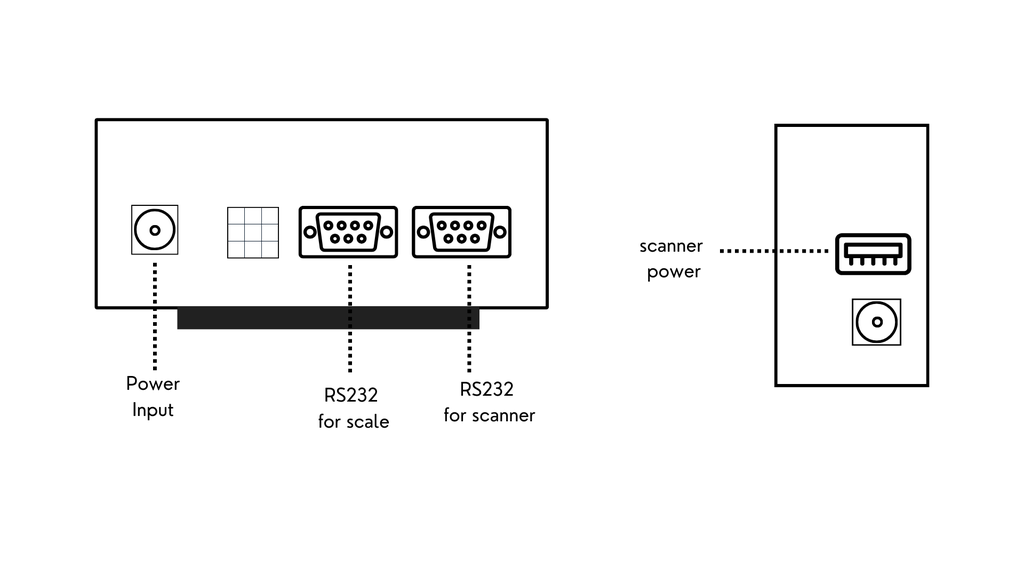
- Connect the Weighing Scale Data Logger to the scanner using the RS232 cable.
- Connect the Weighing Scale Data Logger to the weighing scale using the RS232 and fasten the screws.
- Connect the DC to the USB cable for the scanner to the USB port.
- Connect the DC to the DC cable for power to the OUT port.
- Connect the provided 12V power supply to the Power Input port.
3.0 POWERING ON
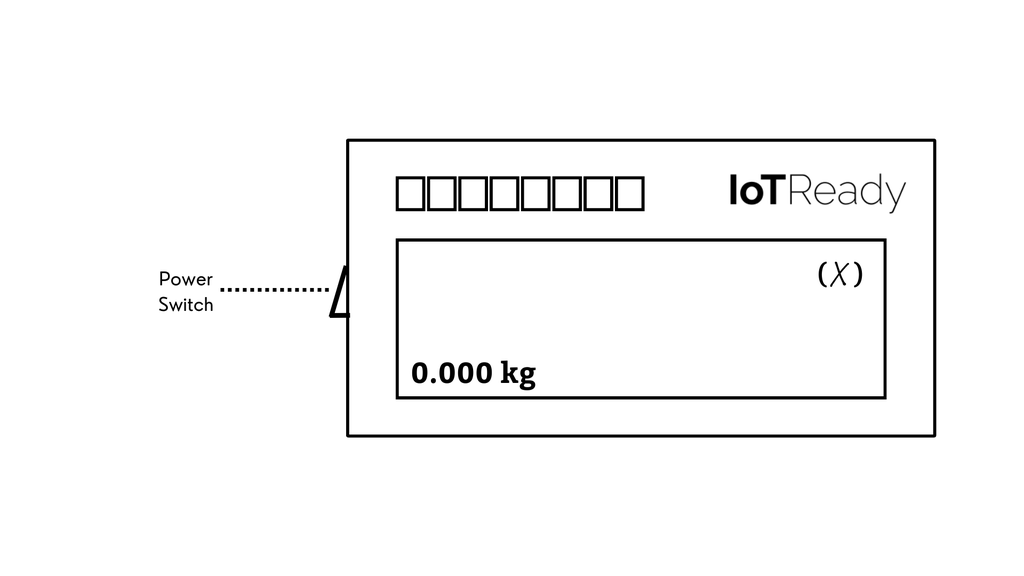
- Use the switch on the left side (facing the display) of the device to power on the device.
For any issues, please reach out to us at support@iotready.co.